Understanding Finish Trim: Types and Characteristics
Finish trim plays a vital role in defining the aesthetic appeal and functional quality of interior spaces. It encompasses all the decorative and protective moldings placed at junctions of walls, ceilings, doors, and windows, contributing to a room’s overall polished appearance. Crafting a flawless finish requires not only an eye for design but also a comprehensive understanding of various styles, materials, and installation techniques. Whether renovating a traditional home or designing a contemporary space, selecting the right finish trim elevates the ambiance and adds value to your property.
To begin, it’s essential to recognize that finish trim is more than just decorative; it also serves practical purposes such as covering seams, gaps, and irregularities, and preventing damage along edges. Properly chosen and installed trim ensures smooth transitions between different building elements, enhances durability, and allows for creative expression through diverse styles and finishes. In today’s market, a multitude of options exists, tailored for specific interior design themes, material preferences, and budget constraints.
Different Styles of Finish Trim and Their Unique Features
The world of finish trim is rich with a spectrum of styles, each bringing distinct character and purpose to interior spaces. Understanding these styles enables homeowners, contractors, and designers to select options that complement their overall aesthetic.
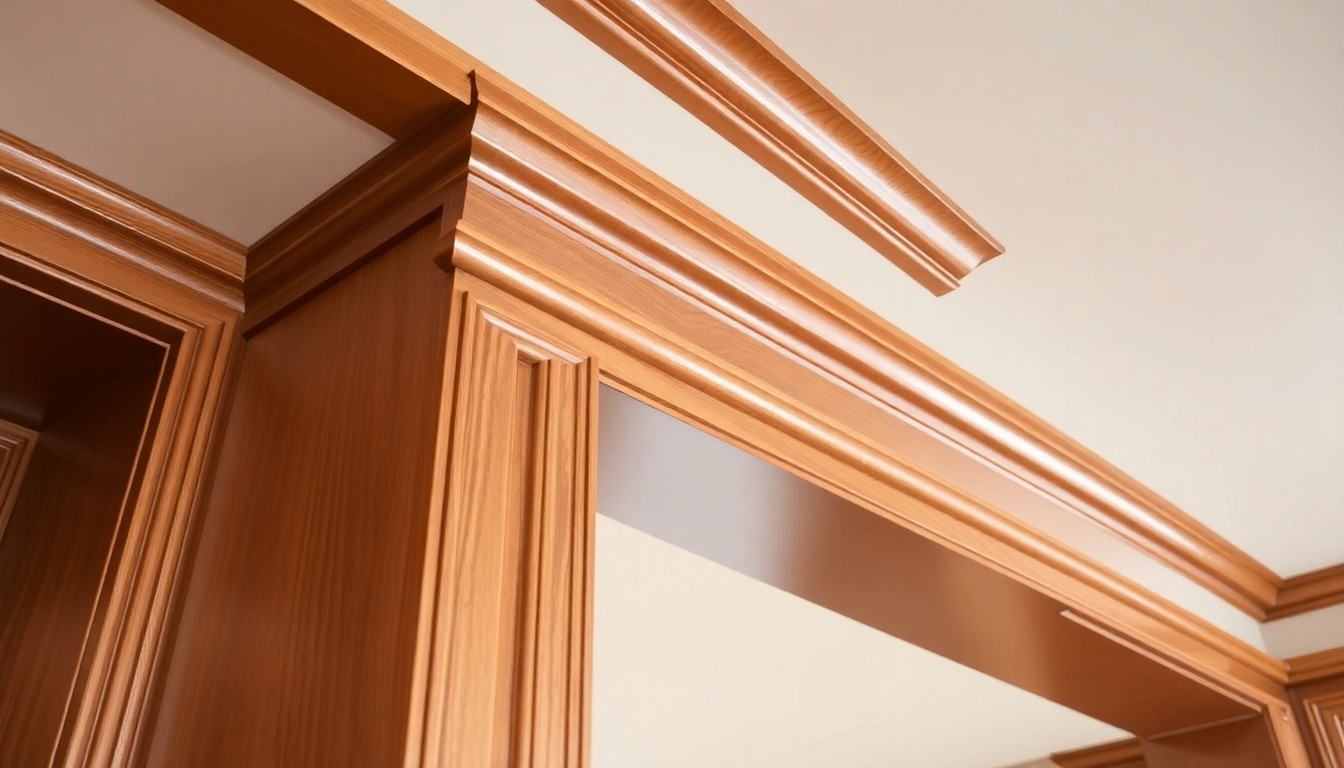
- Crown Molding: Traditionally placed at the intersection of walls and ceilings, crown molding offers a graceful transition, adding elegance and height to a room. It varies from simple, straight styles to intricate, ornamented designs, suitable for both classic and modern interiors.
- Baseboards: Located along the perimeter of the floor, baseboards conceal the joint between the wall and the floor. They provide a clean finish, protect walls from impacts, and vary in height and profile depending on the style of the home.
- Door and Window Casing: These moldings frame openings and serve to enhance architectural features. Styles range from minimal profiles for contemporary designs to detailed, decorative casings in traditional settings.
- Quarter Round and Shoe Molding: These small trims are used to cover gaps at the bottom of baseboards, providing a seamless transition from wall to flooring and hiding potential unevenness.
- Picture Rail and Chair Rails: Additional decorative elements that add visual interest and protect walls from furniture contact, often used in formal or vintage-inspired interiors.
Each style offers unique characteristics—some emphasizing ornate detail, others prioritizing clean lines. Selecting the correct style hinges on the room’s design theme, the architectural period, and personal taste.
Materials Commonly Used for Finish Trim
The choice of materials directly impacts the durability, appearance, ease of installation, and cost of finish trim. The most prevalent materials include:
- Wood: The classic choice, offering versatility and a natural aesthetic. Types such as pine, oak, maple, and cherry are popular, each with distinct grain patterns and finish options. Solid wood provides excellent durability but may be more expensive and susceptible to moisture.
- Medium Density Fiberboard (MDF): A cost-effective, stable alternative to solid wood. MDF is easily routable, holds paint well, and resists warping, making it ideal for painted finishes. However, it is sensitive to moisture and not suitable for humid environments.
- PVC and Vinyl: Waterproof and lightweight, suitable for bathrooms, kitchens, or exteriors. PVC trims are resistant to moisture and insects, but may lack the high-end appeal of wood or MDF.
- Polyurethane and Polystyrene: Lightweight, easy to install, and available in detailed profiles. These materials are often pre-primed and can be painted for a decorative look, suitable for DIY projects.
When selecting materials, consider the specific application, environmental conditions, and desired finish quality. For maximum aesthetic value and longevity, pairing the right material with proper finishing techniques is crucial.
Choosing the Right Finish Trim for Your Home Style
Matching your finish trim with your interior design theme ensures cohesiveness and enhances overall visual impact. Here are some tips for aligning trim choices with different home styles:
- Traditional Homes: Opt for detailed crown moldings, ornate casings, and wider baseboards crafted from rich woods like oak or cherry. Decorative profiles with intricate carvings evoke a sense of grandeur.
- Modern and Minimalist Spaces: Choose sleek, simple profiles with clean lines, such as flat or square-edged trims. Use painted MDF or polyurethane in neutral colors to maintain a streamlined look.
- Rustic or Craftsman Designs: Feature natural wood finishes with visible grain, medium to wide profiles, and handcrafted details to enhance warmth and authenticity.
- Industrial or Loft Styles: Incorporate raw, unfinished wood or metal accents, minimal trim profiles, or even exposed structural elements for an edgy, modern appeal.
Understanding how trim complements your overall decor allows you to make informed decisions that lead to a harmonious and inviting environment.
Installation Techniques for Flawless Finish Trim
Measuring and Planning Your Finish Trim Layout
Proper measurement and planning lay the foundation for a successful trim installation. Accurate measurements prevent unnecessary waste, ensure precise cuts, and facilitate a professional appearance.
- Tools Needed: Tape measure, square, level, pencil, chalk line, and digital measuring devices.
- Steps:
- Start by assessing the room’s dimensions, noting any irregularities such as wall deviations or existing damage.
- Determine the desired location and profile of each trim piece, considering architectural features and stylistic preferences.
- Use a chalk line or laser level to mark reference lines across walls and ceilings for consistent alignment.
- Calculate the total length of each trim type needed, including extra for waste and adjustments.
Planning with precision minimizes errors during installation and results in a seamless, high-quality finish.
Step-by-Step Guide to Installing Finish Trim Carefully
Installing finish trim involves careful execution to achieve tight joints, smooth lines, and a refined look. Follow these steps for optimal results:
- Preparation: Gather all tools, materials, and safety equipment. Acclimate trim to room conditions to prevent warping.
- Cutting: Measure and cut trim pieces accurately, using miter saws or handsaws. Employ a sharp blade for clean cuts, especially at corners.
- Positioning: Dry-fit pieces to verify fit and placement before fastening. Mark nail holes and joint locations.
- Attachment: Use finishing nails or brad nails with a nail gun or hammer. Drive nails slightly below the surface and countersink.
- Seaming and Joints: Join pieces with tight joints, utilizing mitered corners for corners and coped joints for longer runs.
- Filling and Sanding: Fill nail holes and gaps with high-quality wood filler or caulk. Sand smooth for a seamless surface.
Attention to detail during each step ensures a professional-looking installation that stands the test of time.
Tools and Tips for Achieving a Professional Look
Several specialized tools and expert tips facilitate precision and quality in finish trim installation:
- Miter Saw: For accurate angled cuts, especially at corners and joints.
- Level or Laser Level: To ensure horizontal and vertical alignment.
- Nail Gun: Speeds up fastening while providing consistent nail depth.
- Clamps: Hold pieces securely during fitting or gluing.
- Caulking Gun: For sealing gaps and creating smooth joints.
Key tips include working in optimal lighting, double-checking measurements, and practicing accurate cuts. Patience during installation is vital for a flawless, professional finish.
Finishing and Painting Finish Trim for a High-Quality Finish
Preparation and Surface Smoothing Tips
Achieving a high-quality finished appearance requires meticulous preparation. Sand all surfaces smoothly, paying close attention to corners and joints. Remove dust with a tack cloth or damp rag, ensuring a clean surface free of debris that can impair paint adhesion.
If you’re working with wood, consider applying a primer or stain-blocking sealer prior to painting to enhance durability and color uniformity. For MDF or pre-primed trims, inspect for imperfections or rough edges, and sand lightly as needed before painting.
Selecting the Best Paint and Sheen for Trim
Choosing the appropriate paint and sheen is essential for both aesthetics and longevity. Experts often recommend finish trim with a semi-gloss or satin finish. These sheens provide a smooth, durable surface that resists scuffs and simplifies cleaning.
High-quality latex or oil-based paints are preferred, with some opting for alkyd or hybrid formulations for enhanced adhesion and hardness. Consider color schemes to either match or contrast with walls, with classic white, neutral, or bold accent colors depending on your design goals.
Techniques for a Smooth, Durable Finish
Applying paint with precision ensures a sleek, professional appearance. Use high-quality brushes for detailed areas and rollers or spray guns for larger surfaces. Maintain a wet edge to avoid lap marks and thin coats to prevent drips and uneven texture.
Multiple light coats typically outperform a single thick coat, enhancing durability and color vibrancy. Allow sufficient drying time between coats and finalize with a light sanding if necessary for an ultra-smooth surface.
For maximum longevity, top the painted trim with a clear polyurethane or varnish if appropriate, especially for high-traffic areas or where extra protection is desired.
Design Trends and Customization Ideas for Finish Trim
Modern, Traditional, and Eclectic Trim Styles
Customizing finish trim to match your interior design is a powerful way to personalize your space. Here are emerging trends and styles:
- Modern Minimalism: Recessed or flat trim profiles, monochromatic color schemes, and subtle detailing create a clean, uncluttered aesthetic.
- Traditional Elegance: Ornate crown moldings, wide baseboards, and intricate carvings in warm woods evoke classic sophistication.
- Eclectic Mix: Combining different styles, such as rustic wood with sleek modern profiles or painted moldings with decorative motifs, enhances visual interest.
Adding Decorative Elements and Details
Decorative trims like rosettes, medallions, and corbels can be integrated into your trim design to add character. Custom carvings, inlays, or metallic accents further elevate the aesthetic. Consider layered moldings for depth and dimension, especially in feature walls or ceilings.
Using contrasting colors or finishes can highlight these details and provide eye-catching focal points.
Color Coordination and Contrasts to Enhance Spaces
Color choices for trim significantly influence room perception. Bright white trims offer a crisp, modern look, especially when paired with bold wall colors. Darker hues, such as charcoal or espresso, create a dramatic contrast in lighter room palettes, adding depth.
Experiment with two-tone schemes where the trim is painted in a different shade or finish than the walls to create visual separation and highlight architectural features. Always consider lighting conditions and room function when selecting colors.
Maintenance and Care for Long-lasting Finish Trim
Cleaning and Upkeep Tips
Routine cleaning involves dusting with a soft cloth or vacuuming with a brush attachment to remove dirt and cobwebs. For more thorough cleaning, use a damp cloth with mild soap, avoiding harsh chemicals that can damage paint or finish.
Maintain luster and protection by periodically inspecting for chips, scratches, or stains, and addressing them promptly.
Repairing Scratches and Damage
Small scratches and chips can be minimized with touch-up paint matching the original finish. Use fine-grit sandpaper to smooth sharp edges or damaged areas before repainting. For deeper gouges or cracks, remove loose material, fill with suitable wood filler or putty, then sand and repaint.
Reinstall or replace damaged sections when repairs are extensive or repairs compromise structural integrity.
When and How to Refinish or Replace
Over time, even the best finish trim may require refinishing or replacement due to wear, fading, or damage. Signs include peeling paint, persistent dents, or warping.
Refinishing involves stripping the old finish, sanding, repairing any damage, and applying fresh paint or stain. Replacement is advisable when repairs become impractical or when upgrading to new styles or materials aligns better with your interior updates.